100% of bikes make a noise – some more than others. The trick is in identifying whether the noise is good or bad. If you’re here, it probably means the noise you’re hearing from your BMX bike is continuous and isn’t good. So, why do BMX bikes make noise?
Generally, BMX bikes make noise for these reasons: grinding saddle or seat post, loose stem bolts, loose crank spindle, loose chan tension, creaking bottom bracket, loose pedals, and dirty brakes.
BMX bikes have parts with bearings that need to be lubricated using grease or other proprietory lubricants. Components such as cranks, bottom brackets, pedals, and hubs will dry and start squealing if not lubricated regularly.
Other bicycle parts have bolts that might get loose and need tightening. Such parts include the sprocket and the stem.
Also, when certain parts of the bike come in contact, the result is an unpleasant noise. One such instance is the contact between the brakes and the rim wall, especially when the rim wall is dirty.
Now that we know why BMX bikes make noise let us delve deeper into the detail. We’ll review the causes and suggest fixes that won’t need the intervention of a professional bike repairer.
7 Reasons Why BMX Bikes Make Noise And Their Fixes
Here are seven reasons why BMX bikes make noises and their respective fixes:
1. Grinding Saddle or Seat Post
If the creak only happens when you’re riding along in the saddle, the problem could be the saddle itself or the seat post that is grinding.
Fix
- Take out the seat post and remove the saddle.
- Regrease the seat post
- Cover the saddle rails with an anti-seize compound.
- Place the saddle and seat post back. That should eliminate the creaking.
2. Loose Stem Bolts
A stem connects the handlebars to the rest of the frame. Centrally located on the handlebars, stems are either threadless or quill.
They’re usually steel, titanium, aluminum, or carbon fiber. The stem connects to the bike through a steerer tube. Generally, there are between one and three pinch bolts for threadless stems.
These bolts help the stem clamp onto the threadless steerer tube with the compression slot. Stems have a top cap bolt to keep everything in place and help with headset adjustments.
Stems also have between two to six bolts securing the faceplate. If not regularly maintained, all these bolts become loose or rusty, resulting in creaks or clicks when the handlebars turn.
Sometimes the top cap bolt does get loose, resulting in slack in the headset. This play can cause annoying clanks and rattles when cycling.
To help identify whether the creak is from a loose stem, straddle over the bike and wrestle the handlebar.
Fix
You will need the following tools to help adjust and tighten the stem bolts:
- Hex wrenches
- Torque wrenches
- Grease
- Penetrating oil
And now, here’s how to work out loose stem bolts.
- Straddle the bike for stability either at the front wheel or over the top-tube
- Loosen the pinch bolts at the sides BEFORE you loosen the top cap bolt. Apply this Free All Rust Eater Deep Penetrating Oil (Check on Amazon) if the bolts are difficult to remove due to rust.
- Loosen the top cap and check for rust. Apply grease to the top cap after ensuring the threads are not rusty.
- Tighten the top cap bolt to a snag fit to compress the headset and eliminate slack.
- Using the torque wrenches, tighten the pinch bolts at the sides.

3. Loose Crank Spindles
BMX cranks have the build quality to handle abuse. During tests, crank arms are exposed to weights of upto 250 pounds to determine how well they operate.
Some manufacturers even go to double the recommended weights during testing. However, crankset components come loose even with all the weight handling capabilities.
You will know the spindle on the crank is loose if you hear a squeak or creak after every revolution.
Fix
Having identified the source of the noise, here’s how to go about tightening a loose crank spindle.
- Using a hex wrench, remove the pinch bolts for cranks that have them.
- Go ahead and remove the cap bolt at the base of the crank. If you haven’t greased your spindles in a long while, it may take a bit of time to remove the bolts.
- Lubricate the threads.
- Tighten the cap bolt first, followed by the pinch bolts if present.
- After this, the annoying creaking sound should be non-existent.
4. Loose Chain Tension
Like most single-speed bikes, the chain tension on a BMX is set by positioning the rear wheel in the slotted drop-outs. It can be a challenge to set the tension correctly. The loose chain will rattle against the chainstay when the tension isn’t set correctly.
Fix
With the bike flipped, turn the cranks and observe the chain. You will notice that the drive-train has a tight spot and a loose spot.
On the tight spot, the chain is well-tensioned; on the loose spot, the chain is loose. Loosen the axle nuts and move the wheel within the drop-out to adjust the chain tension.
When you get it to a good spot, lightly tighten the drive side. Check the tension by turning the cranks. If you find it difficult to turn the cranks when the chain is in a tight spot, it may be too tight.
With the crank in the tight spot, slightly loosen the axle nut. That should help in getting the correct tension. Remember to grease the inner threads of the axle while you’re at it.
Make sure to align your wheel before tightening the axle nut on the other side.
5. Loose Pedals
BMX pedals have durability and longevity in mind. But even these do get loose or damaged. A loose pedal with broken or worn-out bearings and washers can cause a clicking or creaking sound.
Fix
Turn the bike upside down. Using a 15mm wrench, loosen the pedal. The left BMX pedal threads are opposite.
So to remove them, you’ll have to turn your wrench in a clockwise motion. For the right pedal, a counterclockwise action loosens it.
Sometimes, though, there are threads with a hex fitting behind the axle. Use a Hex wrench to loosen such a pedal.
The most common Hex wrench diameters are either 6mm or 8mm. The direction of loosening the pedal remains the same even when using the Hex wrench – counterclockwise to remove the right pedal and clockwise to remove the left pedal. Get yourself this Best-Rated Hex wrench set – Tekton (View in Amazon).
If you prefer to work with the bike standing, always pull the wrench towards the back of the bike to remove the pedal the correct way, no matter the side.
Clean the threads on the pedal and the crank arm using a rug. It will help in removing built-up grime and grease.
Before refitting, make sure you have the right pedal for each side. Pedals are labeled L (Left) or R (Right) to help you remember which side they go. In addition, most manufacturers now have the left side with grooves and the right side smoothened.
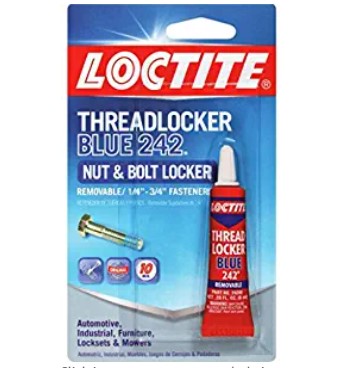
Place a washer or spacer on the axle before fitting it back. Make sure to apply grease or an anti-seize compound such as Loctite (View in Amazon) for lubrication.

6. Creaking Bottom Brackets
Many riders have become victims of the dreaded creak from the bottom bracket. The bottom bracket connects the cranks and allows movement independent of the bike frame.
Fix
Here’s how to fix a creaking bottom bracket.
- You will first have to remove the cranks.
- There are different types of bottom brackets. To get the appropriate bottom bracket remover, you must determine the installed type.
- Clean the bottom bracket and the bottom bracket shell using a cloth.
- Apply an anti-seize compound or grease. You can also use the plumber’s tape if you have none of the suggested lubricants. It’s better to have some form of lubrication instead of nothing at all.
- Torque up the bottom bracket to the recommended settings, fit back the cranks, and you should be able to ride away without creaks!
7. Clogged/Dirty Brakes
Dirt and oil build-up on the rim will cause squealing when braking.
Fix
Take some rubbing alcohol and apply it on a clean cloth. Wipe down the rim.
Use rubbing alcohol to wipe down the brakes. Sand down the brake pad if it looks too shiny. If wiping and sanding don’t work, try to toe in the brakes.
To toe-in means setting the brake pads in so that the front edge of the break hits the rim first.
Brake components such as the calipers require a thread locker – not grease! You can use this Loctite Threadlocker (View in Amazon) for best results.
People Also Ask
Why Do Bikes Make Noise When Coasting?
Bike hubs have a component referred to as a freehub body. The connection between the hub and freehub body allows one to drive the wheel forward or coast on its own.
Elements in the freehub body called pawls attach to the teethed drive-train on the hub surface, allowing forward movement.
When coasting, the pawls disengage and slide over the teeth on the hub surface, making a clicking noise in the process.
Why Does My BMX Bike Click When I Pedal?
Several reasons can cause the clicking of a BMX bike when pedaling. The problem might be damage to the pedal itself, a cracked axle that clicks whenever one pedals, damage to the hub, or absence of hub lubrication.
Why Are BMX Bikes So Loud?
BMX bikes are loud because their hubs have more engagement points. The bike hub is what connects the wheel to the frame. It has a component within it called a freehub body that delivers the power from the pedals to make the wheel rotate.
When you pedal forward, spring-loaded elements in the freehub body called pawls attach to the teeth on the hub surface, allowing forward movement.
When the pawls disengage, they slide over the teeth on the hub surface, making a clicking noise in the process. BMX bikes are loud because they have more of these teeth and pawls.
In Conclusion – Why Do BMX Bikes Make Noise?
An excellent place to start is that loud is kind of the identity, the culture of BMXing. Seriously though, as discussed, BMX bikes make noise due to loose pedals, stems, cranks, seat posts, and saddles.
The problem could also be the brakes, bottom brackets that need greasing, and loose chains. Once you diagnose what is causing the creaks and clicks, you’ll ride away – silently.
Also Read: